Setting up mailing lists and newsletters in Beyond
A Troop newsletter form adds the shopper to Customers in your Shopify admin, with Customer accepts email marketing checked. The theme does not send campaigns or sync Mailchimp/Klaviyo by itself.
Klaviyo, Mailchimp, and other ESP lists need an app or integration, the theme only collects addresses into Customers.
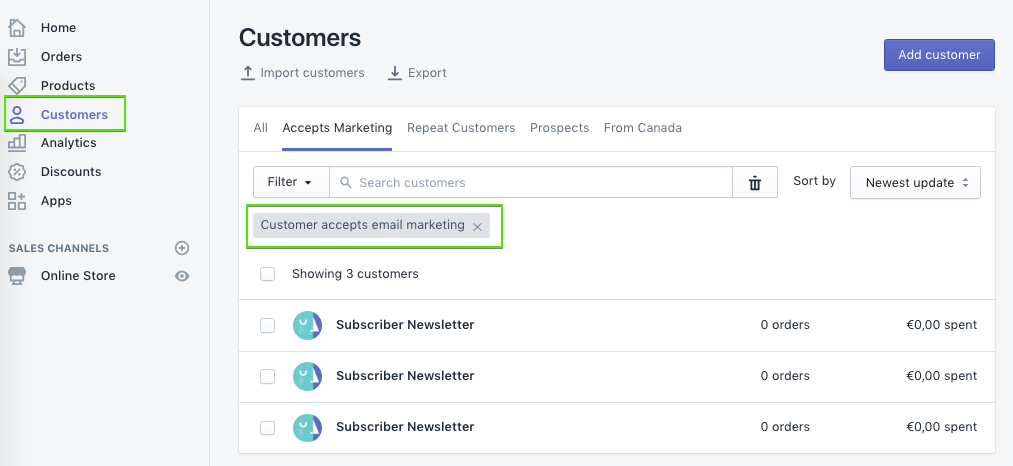
Who owns the list
- Show a form on the storefront: theme (the places below)
- Store the address: Shopify Customers
- Send campaigns / sync to Mailchimp or Klaviyo: an email app or integration
Beyond can show a signup form in several places. You do not need all of them.
Newsletter section
Edit theme → Add section → Newsletter.
Add it to any template. Heading, description, and the form are blocks: Overline, Heading, Description, and Newsletter form. Optional image and Custom liquid (for an app embed) are on the section too.
Image with text overlay
Edit theme → Image with text overlay → Add block → Newsletter form.
Use this when the form should sit on a campaign image with the other overlay blocks (heading, description, buttons). The block has no heading of its own.
Footer
Edit theme → Footer → Subscribe block.
Heading, description, Show newsletter, Show social icons, and an optional image (with its own background and text color) are on that block. Turn Show newsletter off if you want the image, heading, and social icons without a form.
The Email placeholder is default theme content, search mailing. The submit control is an arrow.
Popup
Edit theme → Popups → Add block → Newsletter (small) or Newsletter (large). If the block is already in the section, click the eye icon to show it.
Newsletter (small) sits in a corner; Newsletter (large) is a centered overlay. Heading and description are on the block.
Popup timing and frequency: Configuring the popup.
Password page
Edit theme, open the password template → Password page → Show form and Heading.
Connect with Mailchimp
The theme only writes addresses to Shopify Customers. To get them into Mailchimp, install Mailchimp’s Mailchimp for Shopify app and connect your audience.
See Mailchimp’s connect Shopify guide.
Zapier is another option if you need a custom workflow.
Ask Sidekick 
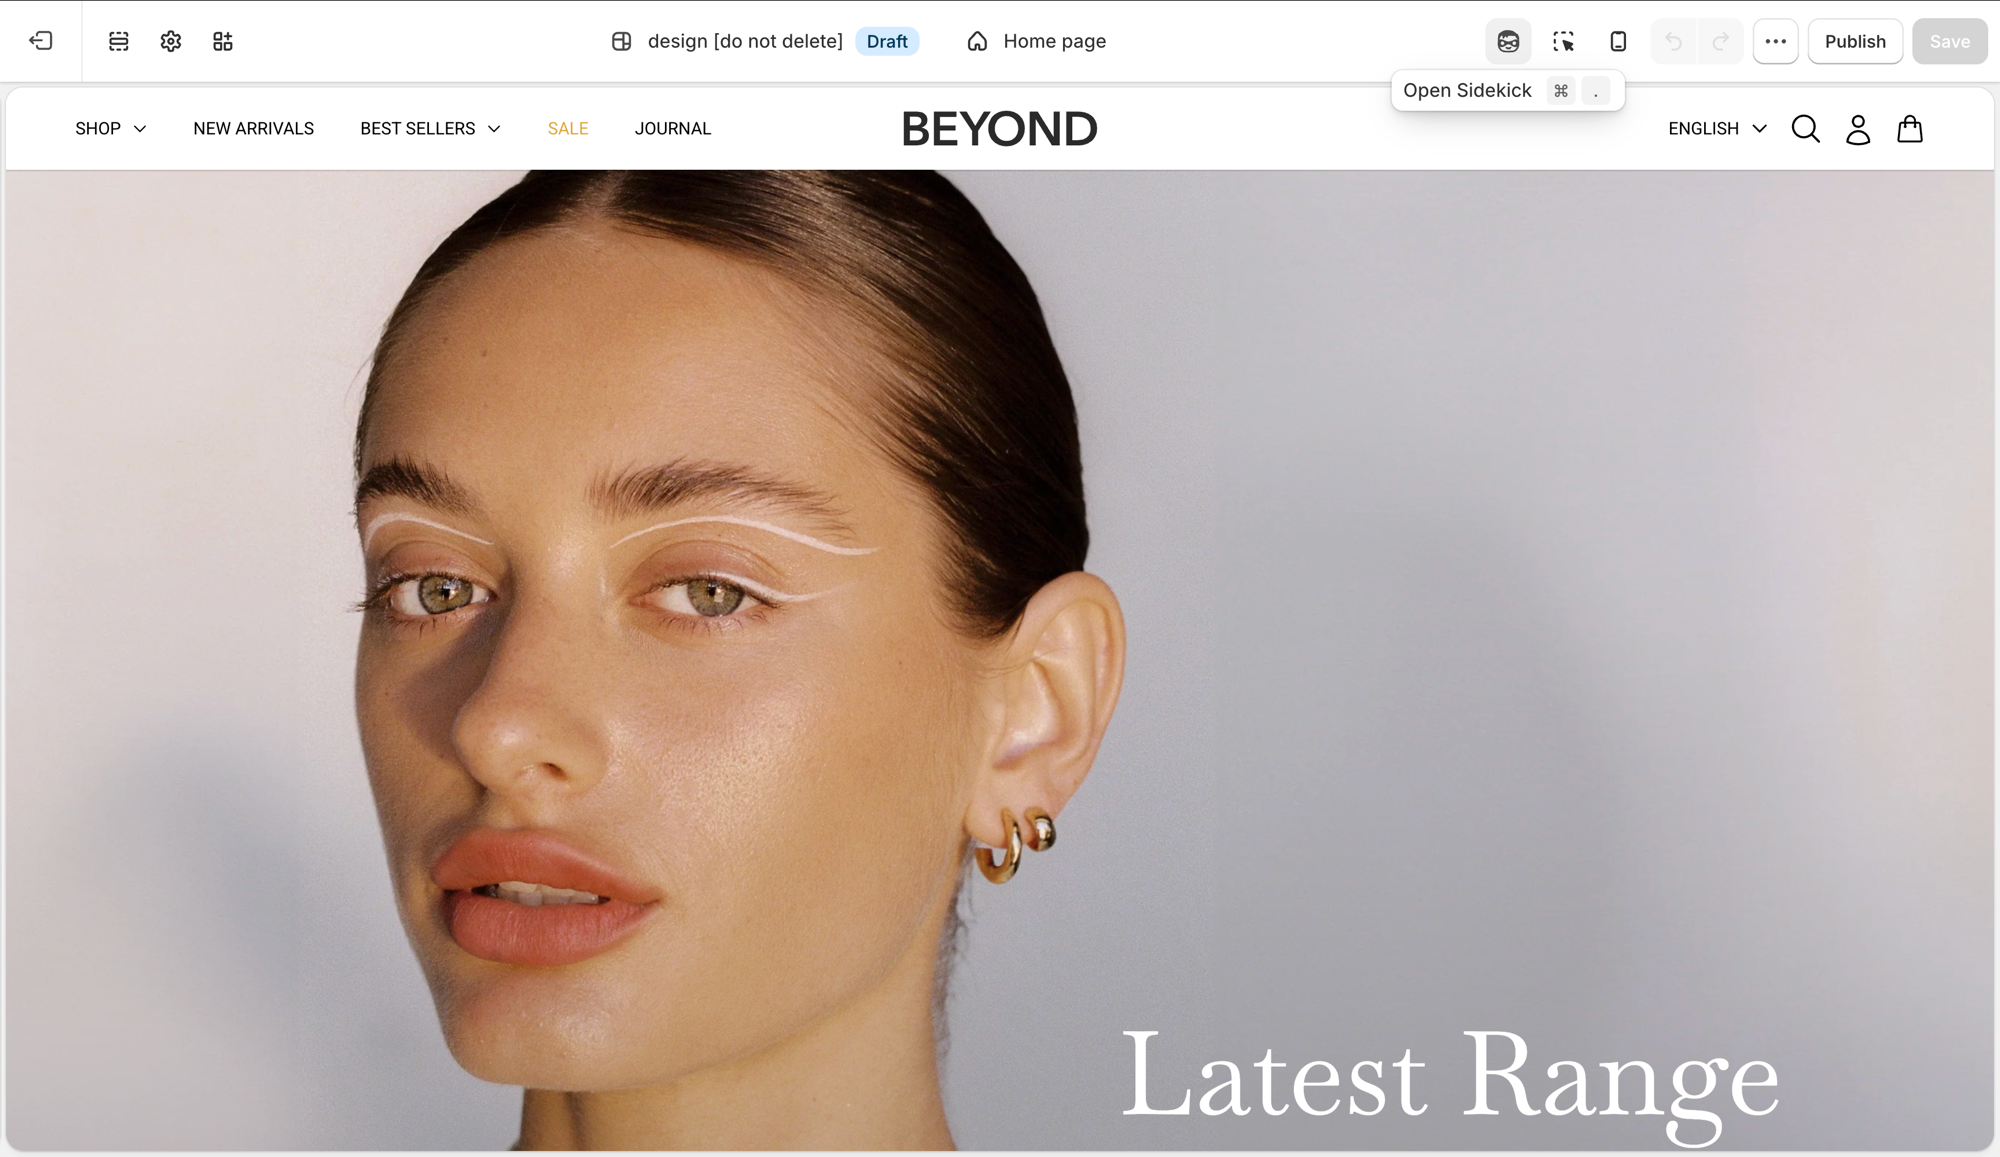
Open Sidekick from the theme editor toolbar (top right, next to the device preview icon), or press ⌘. (Ctrl+. on Windows). It can draft the heading and blurb for your signup form, give it your brand and what subscribers get.
"Write a short, warm newsletter blurb offering 10% off the first order."
It can also draft the welcome or campaign email itself if you're sending through Shopify Email.
Troubleshooting
- No email in Customers: the form may be an app form (Klaviyo, etc.), not the theme form. Check Edit theme → App embeds. App forms do not always create a Shopify customer.
- Theme form works, Mailchimp is empty: expected until you connect an integration. The theme only writes to Shopify Customers.
- Popup never appears: the Popups section must have a newsletter block that is not hidden; frequency may have already fired for that browser. Test in a private window. See Configuring the popup.
- Email placeholder didn’t change: that string is default theme content. Search mailing.
-
Double forms: a Newsletter section and an app embed and the popup (and footer, if you use it). Turn off the ones you do not want.
-
Footer heading shows but no form: the Subscribe block’s Show newsletter setting is off.