Using color swatches with your products
Compatibility
- Beyond versions 4.1.0 and up
- Blockshop versions 10.1.0 and up
- Maker versions 9.1.0 and up
- Emerge versions 7.1.0 and up
- For older versions, see legacy information below
For these versions, we've implemented Shopify's native swatch solution. Older versions support swatches with a different configuration, see Legacy theme versions below.
To take advantage of Shopify's native swatches you'll need to configure product categories and category metafields.
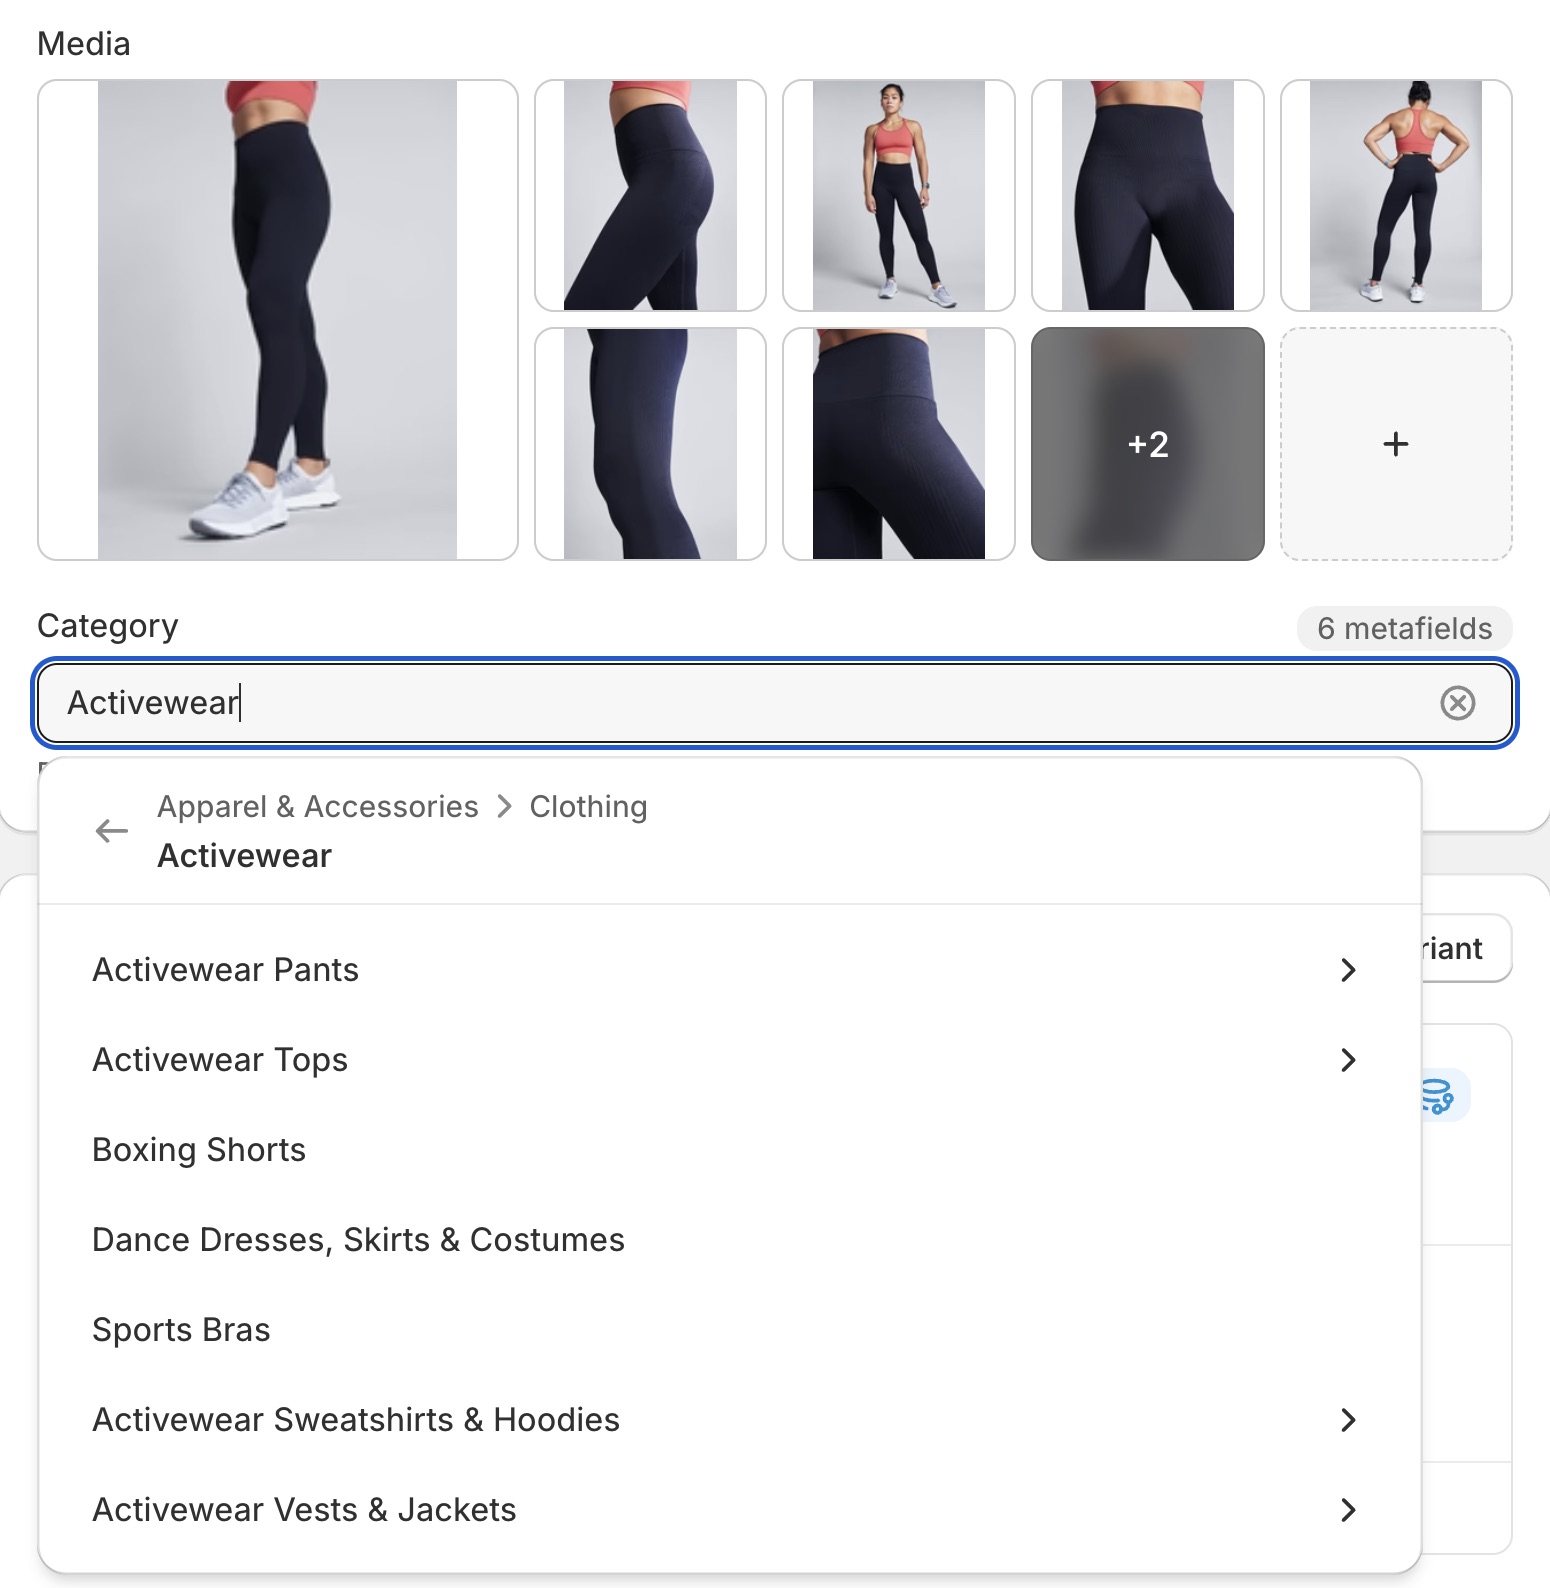
Step One: Add a product category
A product category is selected from the pre-defined categories in Shopify's Standard Product Taxonomy. This is essential for:
- Unlocking product attributes (category metafields) that map to each product category.
- Managing your products better within Shopify, aiding in automated collections or filtering.
- Ensuring accurate tax rates are applied at checkout based on product categorization.
Example Category: Apparel & Accessories > Clothing > Clothing Tops > Shirts. You can add color swatches for any category metafield with the color product attribute.
To Add a Product Category:
- From your Shopify admin, click Products.
- Click a product.
- In the Category section, select Apparel & Accessories > Clothing > Clothing Tops > Shirts or another category with the color category metafield.
- Click Save.

Step Two: Add and edit entries for your category metafields
After adding a product category, you can add entries for your product's variant option values.
To Edit or Add Entries:
- From your Shopify admin, go to Products.
- Click the product with the category metafields you want to edit or add.
- To Add an Entry from Default Entries:
- In the Category metafields section, click the category metafield, then click the entry you want to edit.
- Edit the fields as needed.
- Click Save.
- To Add a Custom Entry:
- In the Category metafields section, click the category metafield, then click Add new entry.
- Fill out the fields for the entry.
- Click Save.
Step Three: Connect your category metafields to variant options
In this step, you'll connect the category metafield for color (or any other category metafield as needed) to your product variants.
To Connect Category Metafields:
- From your Shopify admin, go to Products.
- Click the product you want to edit.
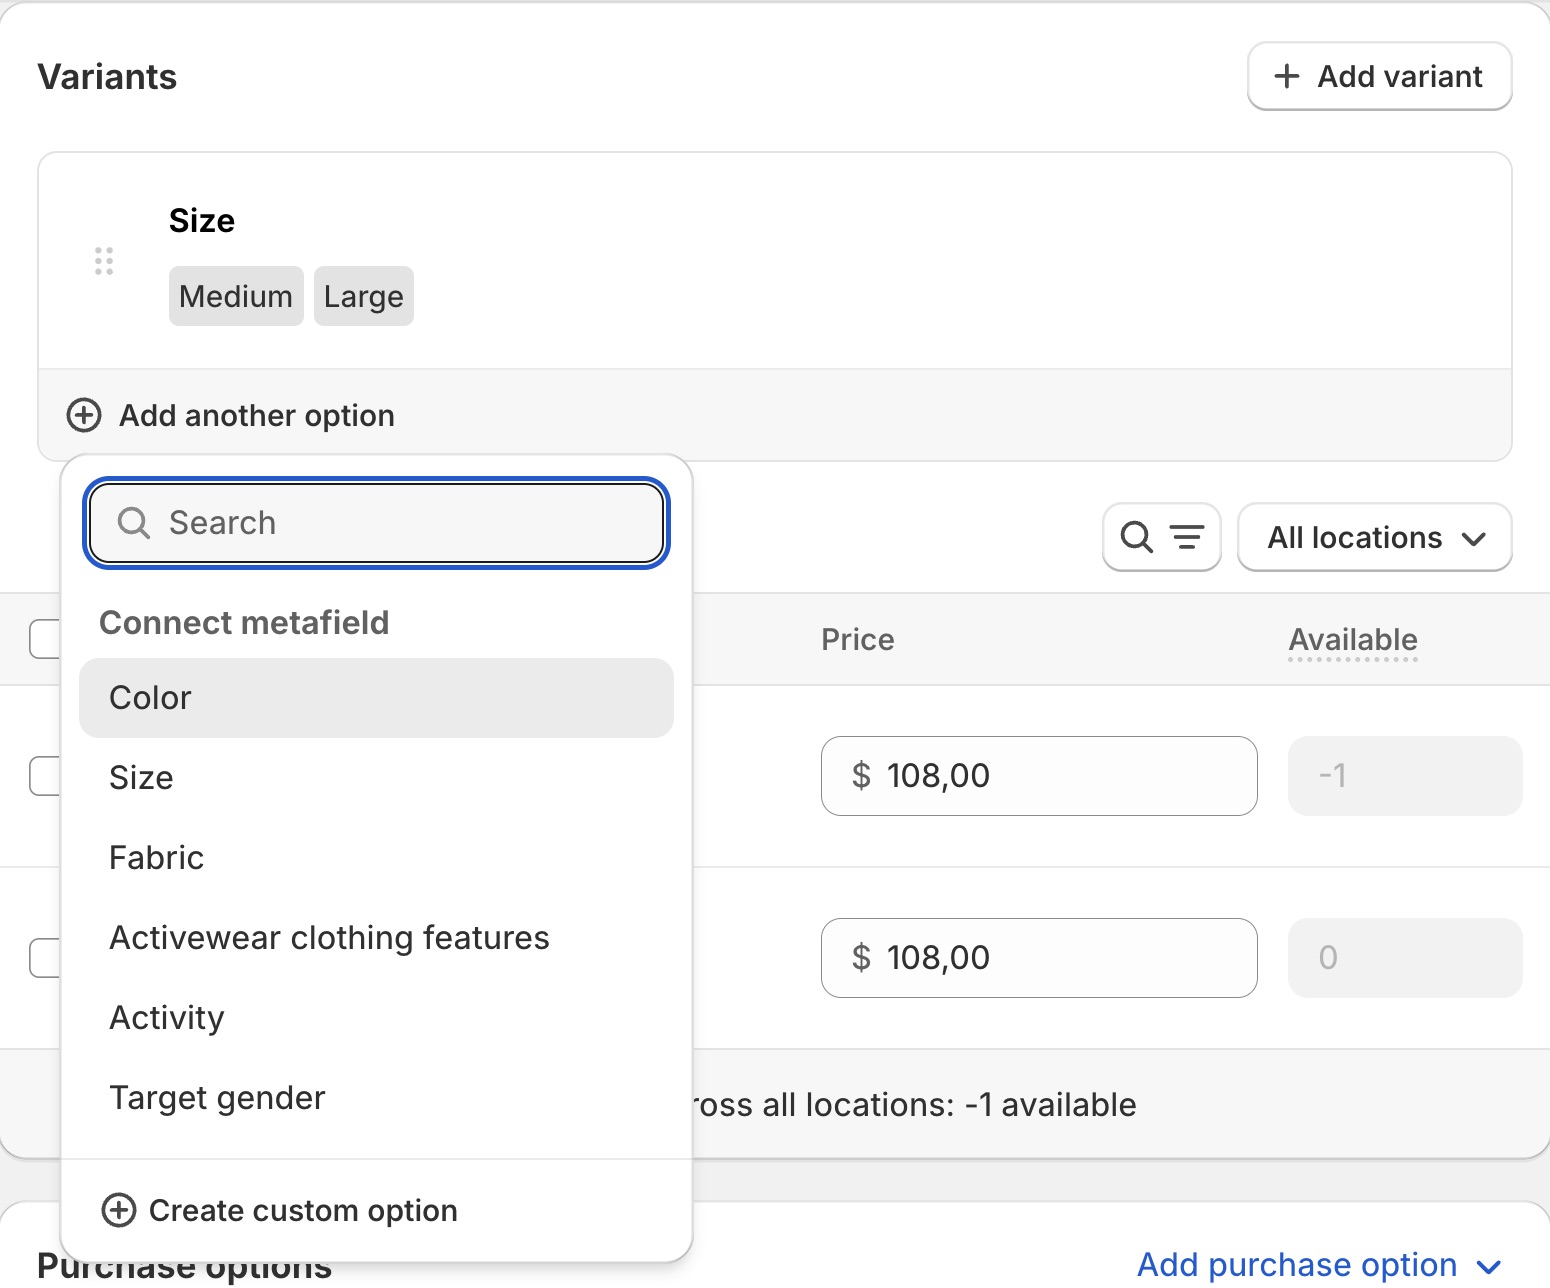
- In the Variants section, click + Add options like size or color.
- If a category metafield is available to connect to, select it. The option values will auto-fill with any entries you've added to the category metafield.
- Optional: To add custom option values, click Edit, then click Add new entry. Fill out the entry fields and click Save.
- Click Save to save the product.

Step Four: Enable swatches at the theme level
Swatches can be enabled in multiple places:
- In the Product Page(s) under the Sections tab
- On the Home Page, inside the Featured Product section under the Sections tab
- In the Theme Settings tab, under the Product Grid section
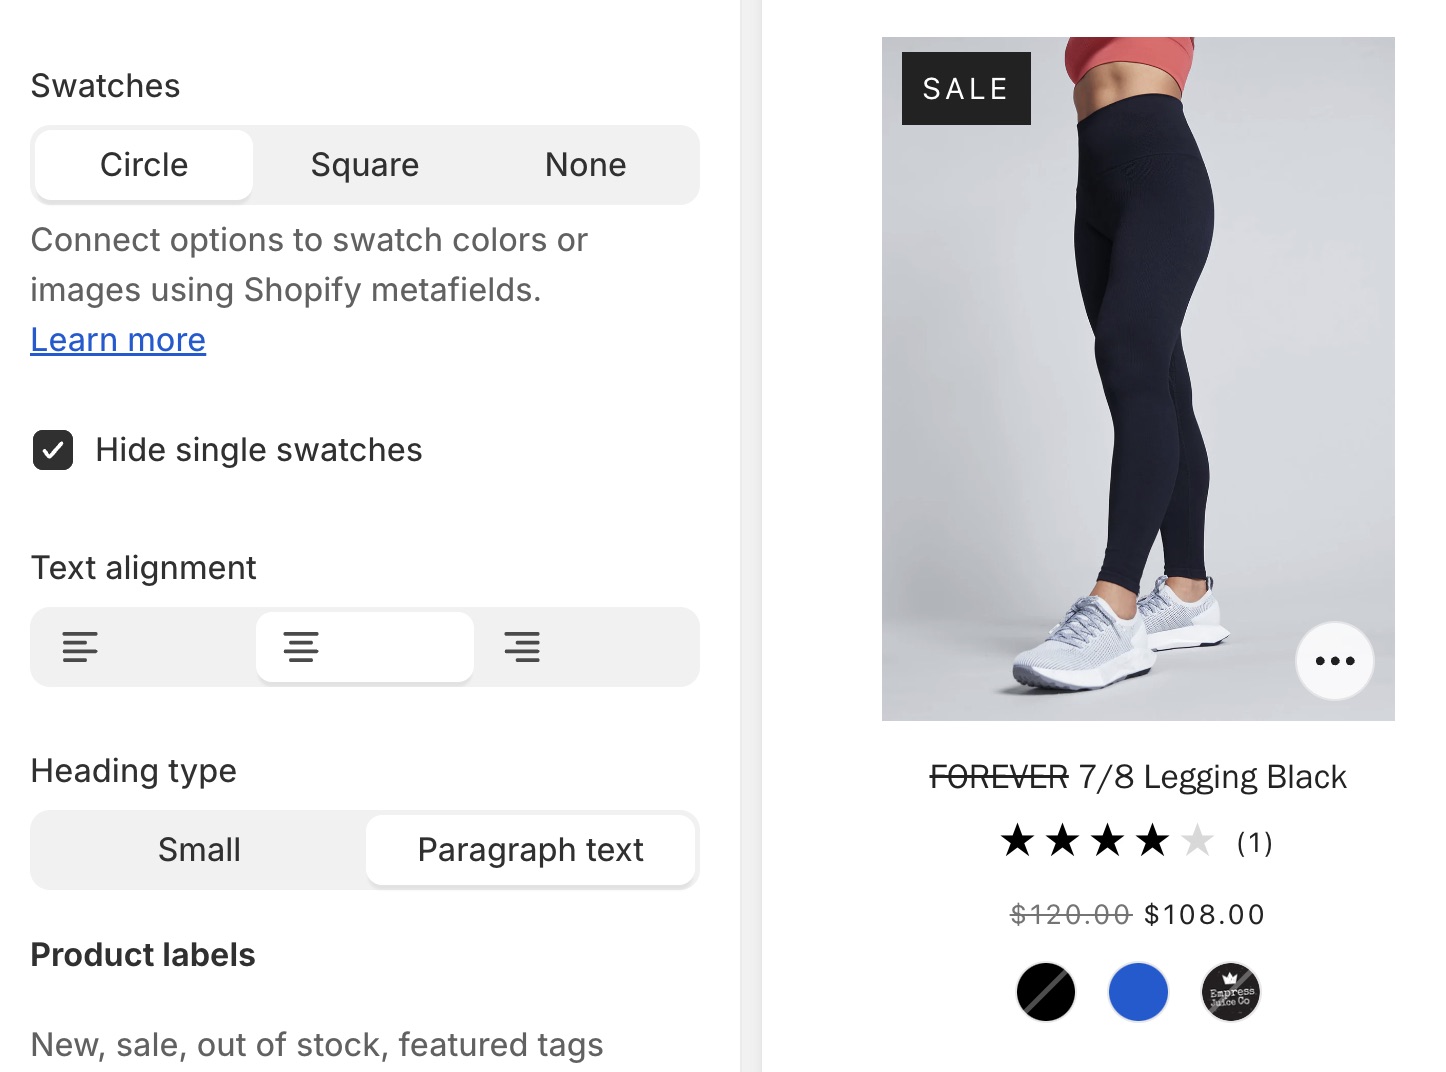
In all cases, selecting "Round" or "Square" will turn on the feature.
When enabled, the theme will turn configured options into clickable swatch selectors:

Legacy theme versions
Color swatches can be enabled in multiple places:
- In the Product Page(s) under the Sections tab
- On the Home Page, inside the Featured Product section under the Sections tab
- In the Theme Settings tab, under the Product Grid section
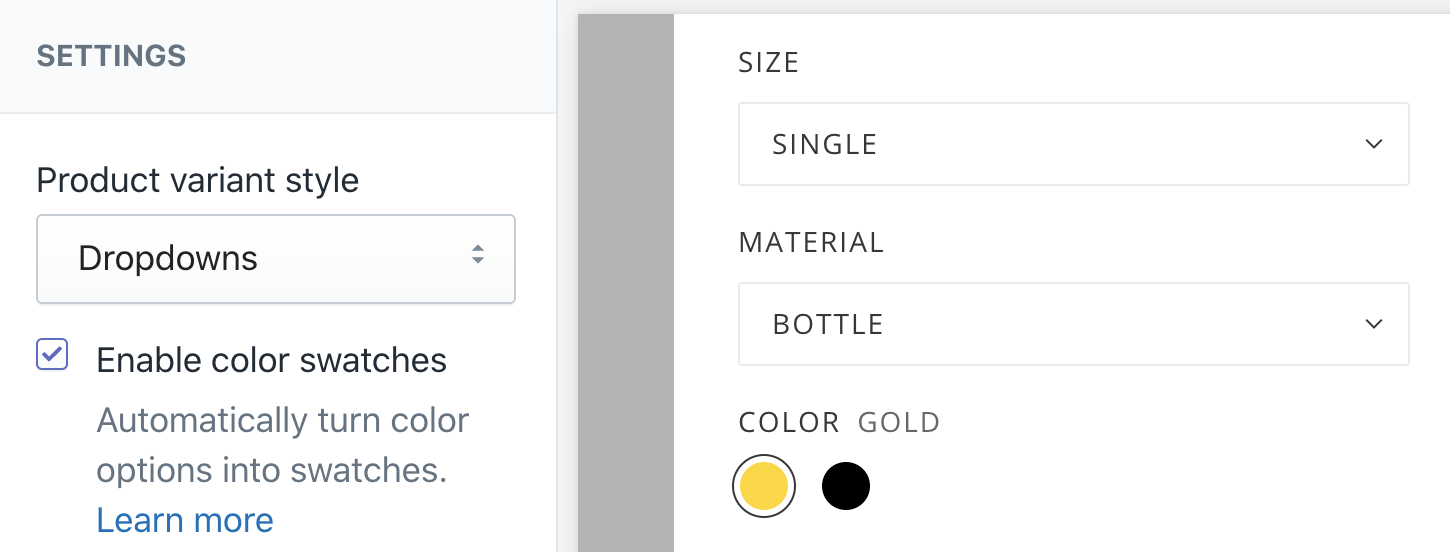
When enabled, the theme will automatically turn an option titled "color" into clickable color swatches:

The default colors are set as standard CSS colors. For example, "gold" is defined as #ffd700. The complete
list of standard CSS colors can be viewed on MDN.
Non-English themes
- "Color" will be translated according to your
locales/*.jsonfile. For example, if you desire "couleur" to be the option with swatches, be sure to translate any instance of "color" insidelocales/fr.jsonto "couleur" - Non-english colors such as "rouge" will need to be added manually as defined below in Adding custom colors
Adding custom colors
Default colors can be overwritten with values defined by the store-owner. In addition, values not defined as a CSS color can be added.
For the following versions:
Versions with swatch settings inside Theme settings > color
- Beyond - versions 3.0.0 to 4.0.1
- Blockshop - versions 9.0.0 to 10.0.1
- Maker - versions 8.0.0 to 9.0.1
- Emerge - versions 6.0.0 to 7.0.1
Swatch color settings can be found inside the Color submenu inside the global theme settings.
If you want to assign the color value deep red to the color value rgb(131, 45, 39), you'd add the following line to the Color swatch configuration textbox:
deep red: rgb(131, 45, 39)
Formatting is very important!
- each rule must be on a new line
- the name and value are separated by a single colon (":") character
- the value can be defined as either a hex or RGB value
- colors that don't follow the above format will revert to their default values
- use a tool like Adobe Color if you need help determining which color value is appropriate for your product
For even older versions, you can add swatch settings in the following way:
- open
snippets/swatch-colors.liquidorsnippets/framework--swatch-colors.liquid - find the following lines:
{% capture swatch_colors %}
  {% comment %} remove this line and add your first color here {% endcomment %}
{% endcapture %}
- replace the line containing
{% comment %}with your custom colors, for example:
{% capture swatch_colors %}
  gold #D4AF37
  navyblue rgb(0, 0, 128)
{% endcapture %}
Formatting is different for older versions
- color names are always lowercase, and multi-word colors contain no separators (including spaces)
- the name and value are separated by a single space character
- the value can be defined as either a hex or RGB value
- each new color begins on a new line
- colors that don't follow the above format will revert to their default values
Adding custom images
Store-owners have the ability of uploading an image to be used as a swatch, such as a product's material or pattern.
Swatch images always override custom or default swatch colors
We recommend images with a resolution of 100x100 pixels and a .png extension (although .jpg and .gif will work as well).
To add an image file:
- from your Shopify admin page, click "Settings" in the lower left-hand corner
- click "Files" in the lower-middle column
- click "Upload Files" in the top-right corner
- select your swatch file
For the following versions:
Versions with swatch settings inside Theme settings > color
- Beyond - versions 3.0.0 to 4.0.1
- Blockshop - versions 9.0.0 to 10.0.1
- Maker - versions 8.0.0 to 9.0.1
- Emerge - versions 6.0.0 to 7.0.1
You'll need to update the swatch settings inside the Color submenu of the global theme settings to take advantage of the file you just uploaded.
If you want to assign the color value stripes to the uploaded file stripes.png, you'd add the following line to the Color swatch configuration textbox:
stripes: stripes.png
Formatting is very important!
- each rule must be on a new line
- the name and value are separated by a single colon (":") character
- the value can be defined as either a hex or RGB value
- colors that don't follow the above format will revert to their default values
For even older versions of the theme, you'll need to navigate to your theme's snippets/swatch-colors.liquid or snippets/framework--swatch-colors.liquid file to use the file you just uploaded.
- find the following lines inside
snippets/swatch-colors.liquidorframework--swatch-colors.liquid:
{% capture swatch_color_list %}
  {% comment %} remove this line and add your first color here {% endcomment %}
{% endcapture %}
- replace the line containing
{% comment %}with the color and matching file name, for example:
{% capture swatch_color_list %}
  gold gold_swatch.png
  desertcamo Desert-Camo.jpeg
{% endcapture %}
Formatting is different for older versions
- color names are always lowercase, and multi-word colors contain no separators (including spaces)
- the color name and file name are separated by a single space character
- file names should match the file uploaded in previous steps (including file extension)
- each new color begins on a new line
- colors that don't follow the above format will revert to their default values
Considerations for theme updates
Swatch settings will be migrated automatically for the following versions:
Versions that support automatic updates
- Beyond - versions 3.0.0 and up
- Blockshop - versions 9.0.0 and up
- Maker - versions 8.0.0 and up
- Emerge - versions 6.0.0 and up
Otherwise, custom color and image definitions will need to be copied over from the existing theme's snippets/swatch-colors.liquid or snippets/framework--swatch-colors.liquid file into the new theme's file of the same name.
You do not have to re-upload image files.